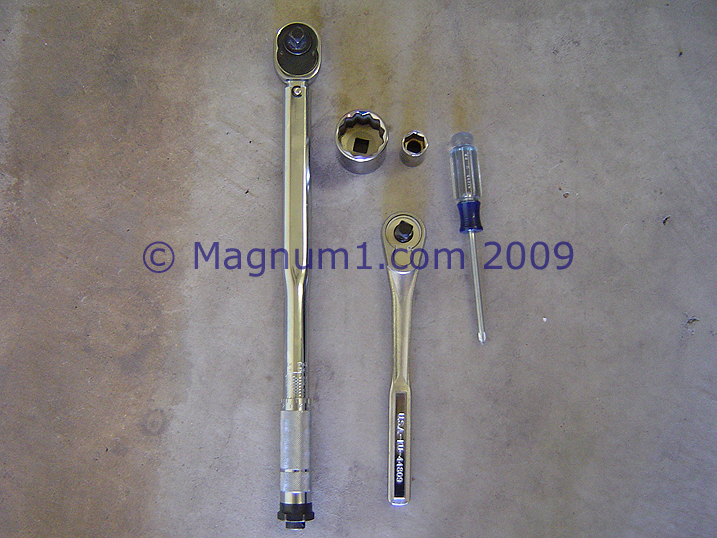
| Tools awaiting their work: |
|
| My car sits a little low for the
jack, so I have to run up on 2x6's before I can get the jack
under the center main frame.
Like the basketweaves?!?!, I
don't but they're what I ride in the winter months: |
|
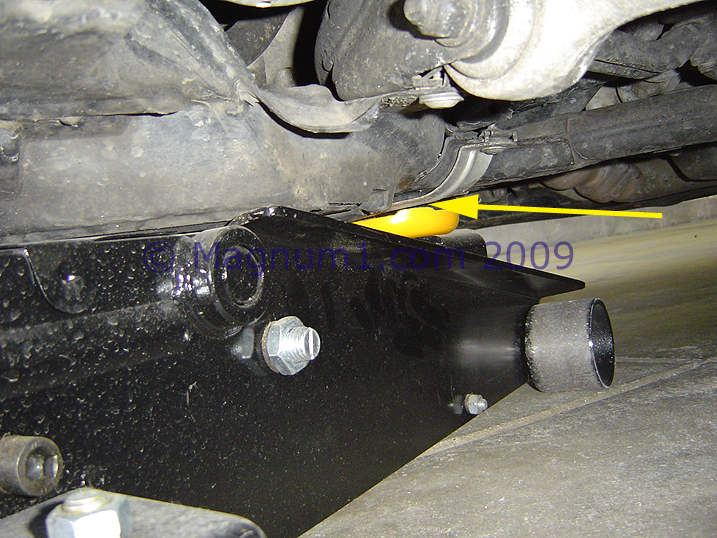
| Put the jack under the main
frame. You really can't miss the puck that's there.
I place the jack dead center and lift the whole front end at
once: |
|
| Up-a-rooney: |
|
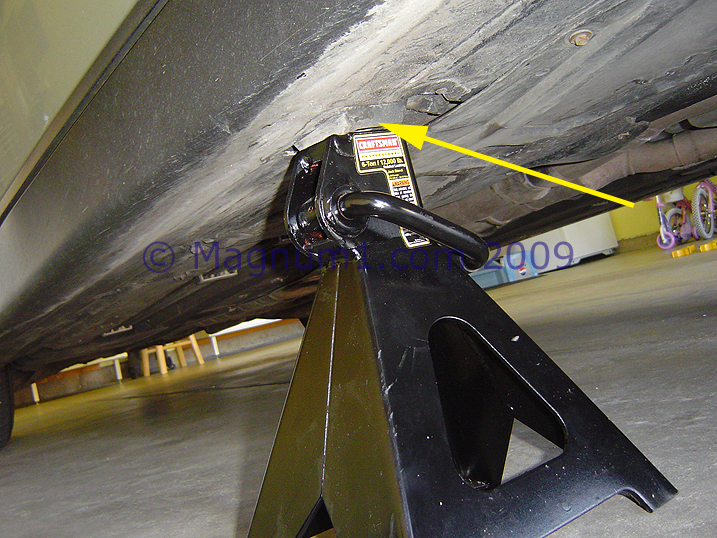
| Now, with the stands I have I
really have to get the front end way up in the air, so to make
it a little less up in the air I take out the jack stand arms
and just rest the cars jack pads right on the stands
themselves: |
|
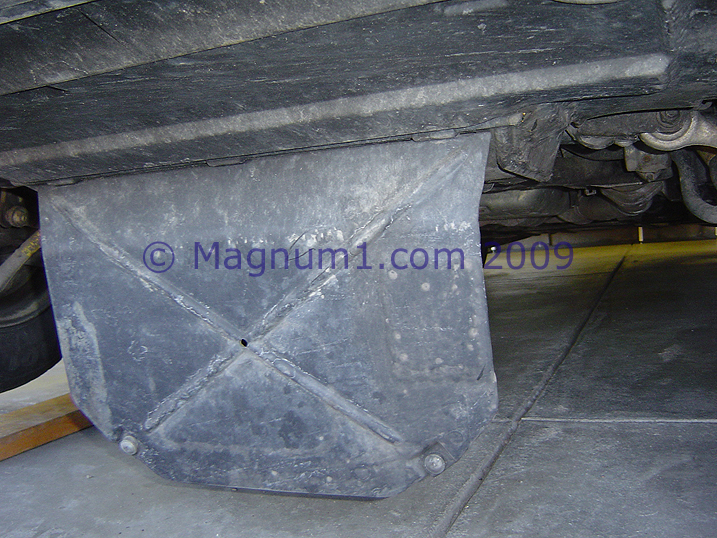
| Now remove the cover / flap to
reveal the oil pan. Simple 2 phillips head screws: |
|
| Let it hang: |
|
| And finally pull it off by
sliding it out of the grooves where the tabs fit in: |
|
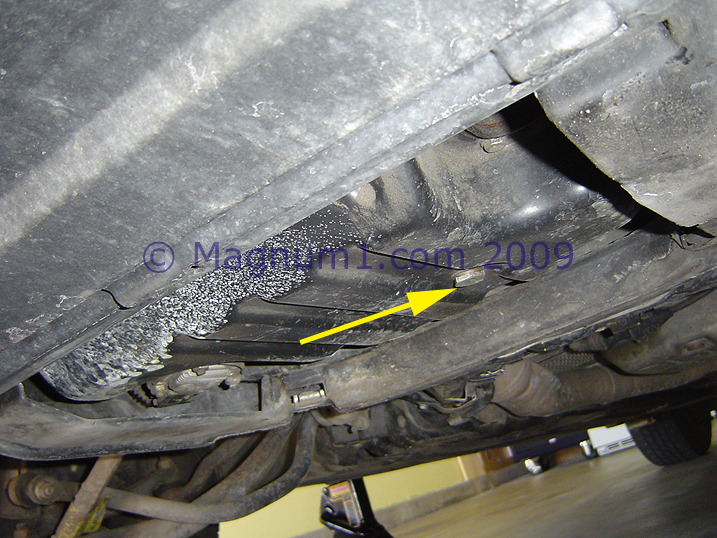
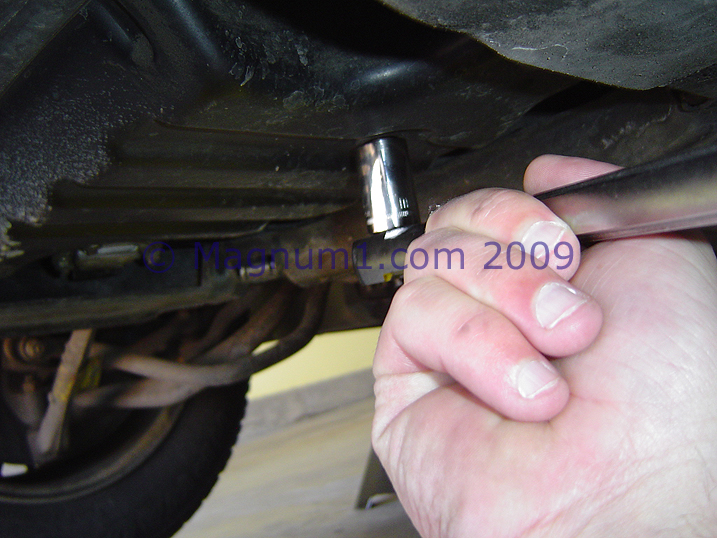
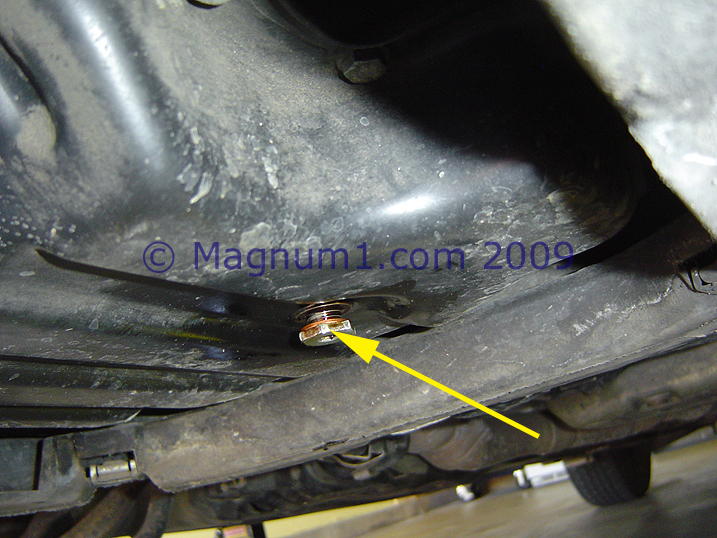
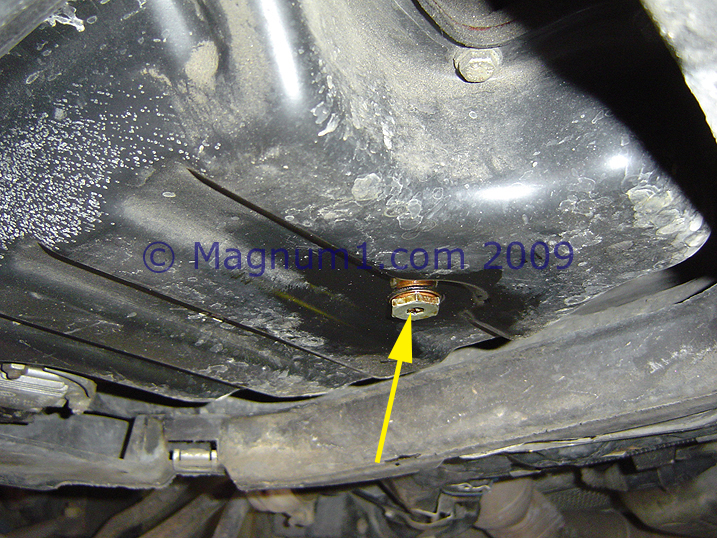
| Here's your oil drain plug: |
|
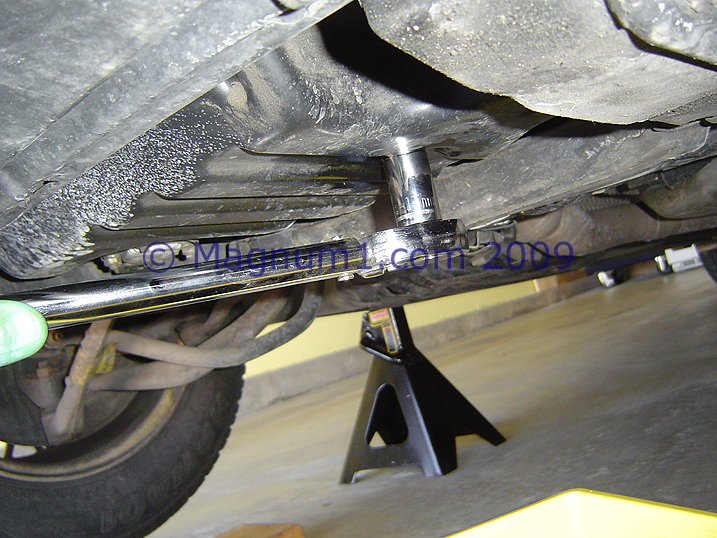
| Simply unbolt it using a 17 MM
socket. Righty-Tighty, Lefty-Loosey...: |
|
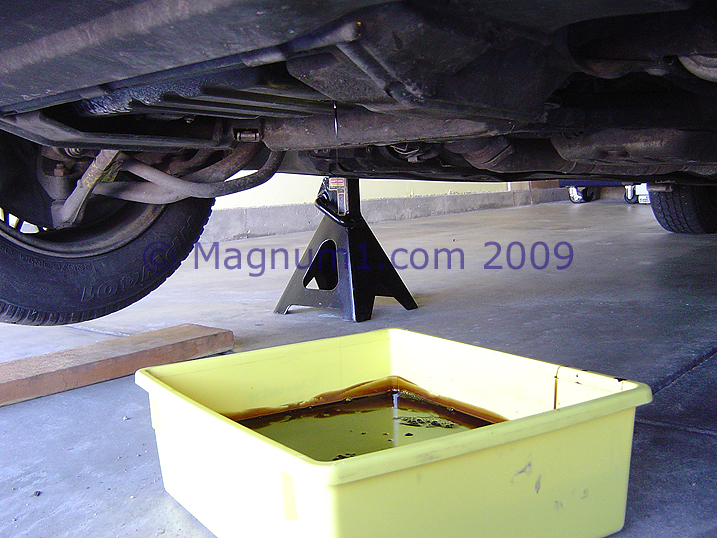
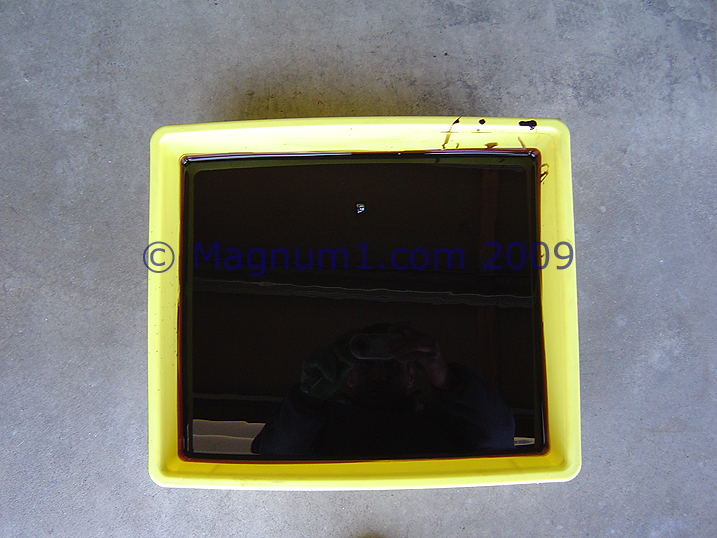
| Make sure you have your drain
pan positioned properly, and let it flow: |
|
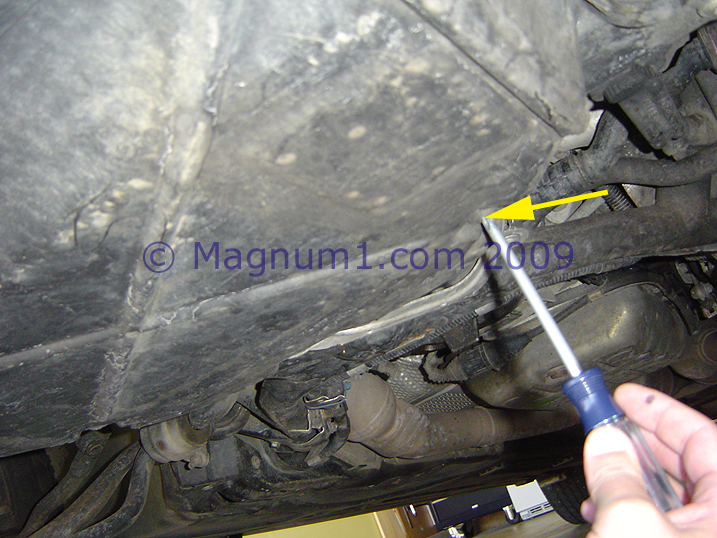
| Now you should have already
popped the hood latch inside the cars cabin, so now pop the
hood: |
|
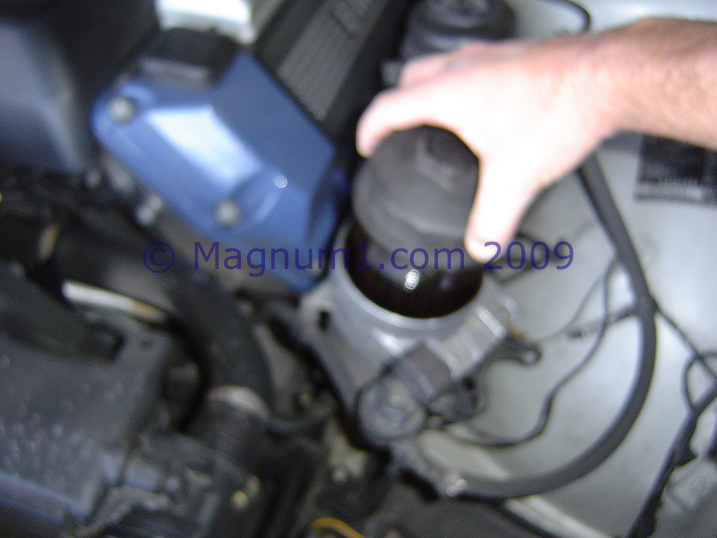
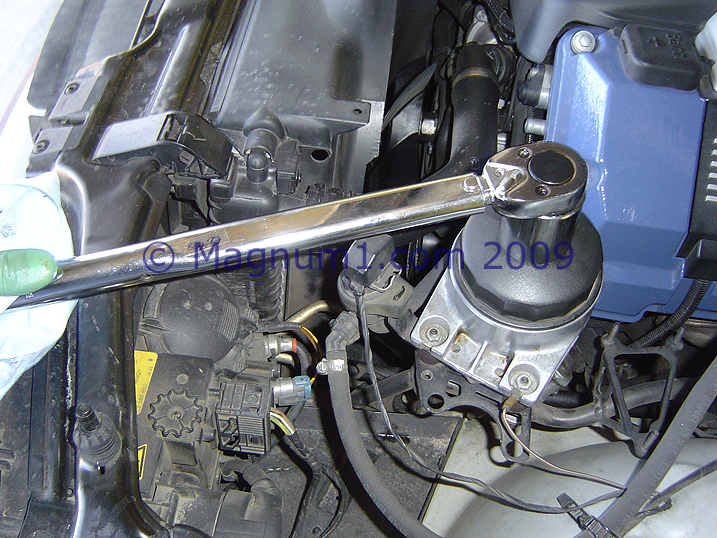
| ...and unscrew the oil filter
housing cover.
You
could use a filter wrench, strap wrench or the like, but I use
a regular 36mm socket. They can be had for ~$10, and the
ability to torque it on the reinstall is priceless.... |
|
| Once loose, pull it and and make
sure you have a plan as to where you'll put it. I double
bag some plastic grocery bags, and set it in there for the
time being. Sorry 'bout the blur: |
|
| Like this: |
|
| Now let the oil drain for a
while. You can grab a beer, a coke, have a smoke....or whatever
floats your boat while all the oil drains.
I personally move on to the next
steps while it drains...: |
|
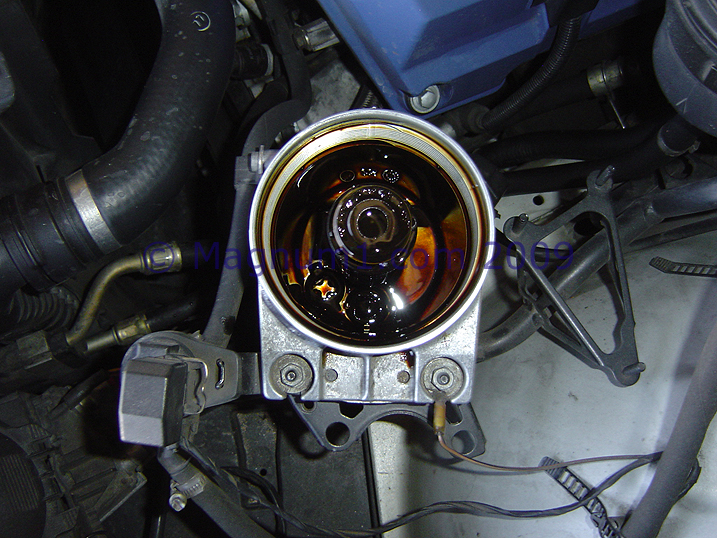
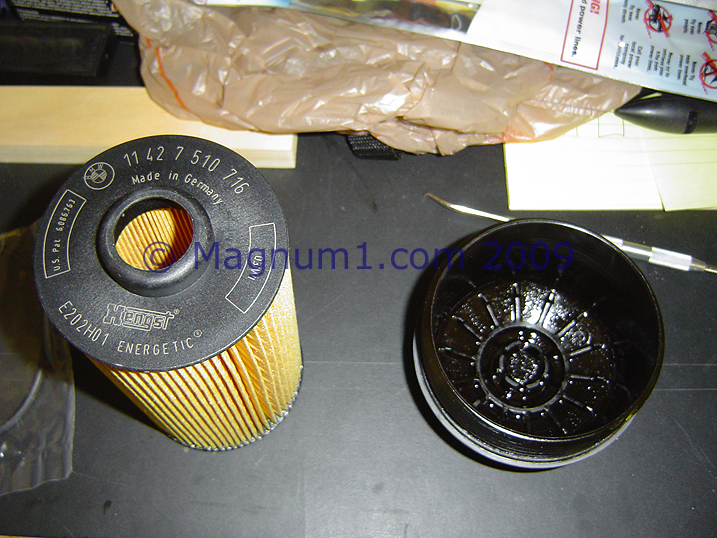
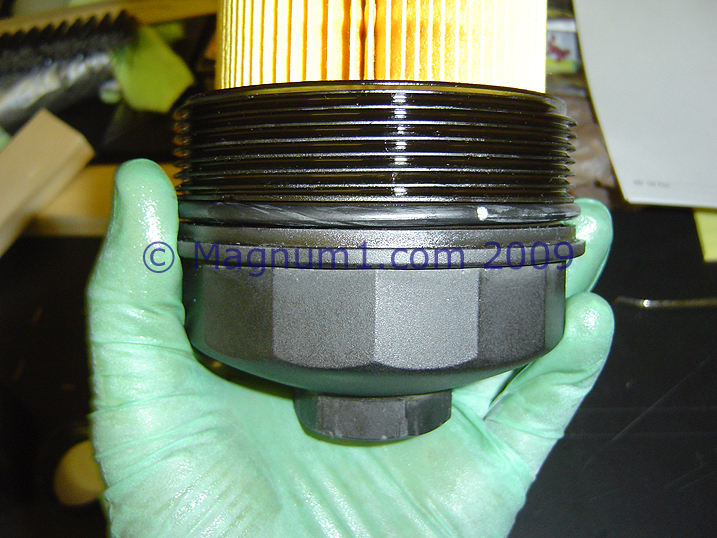
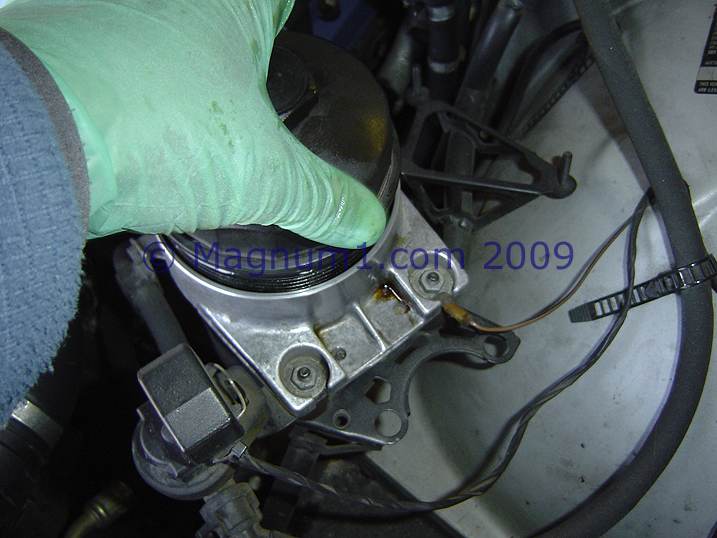
| Oil Filter housing minus the
cap: |
|
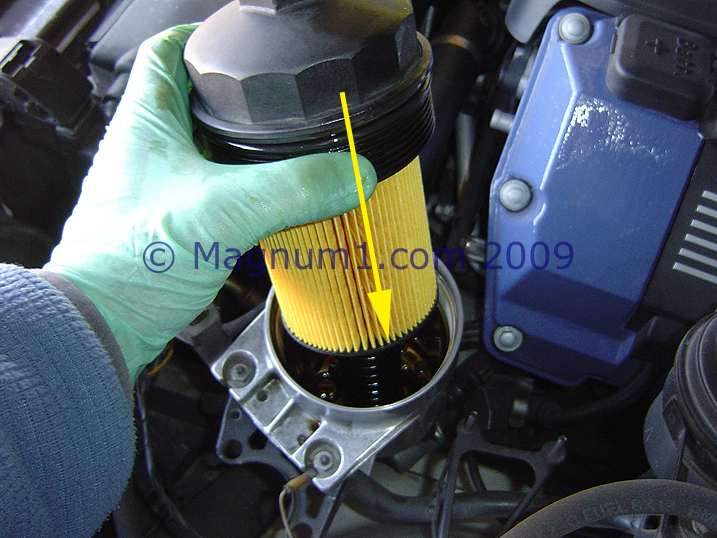
| Now I wrap the filter in the bag
and then pop it free: |
|
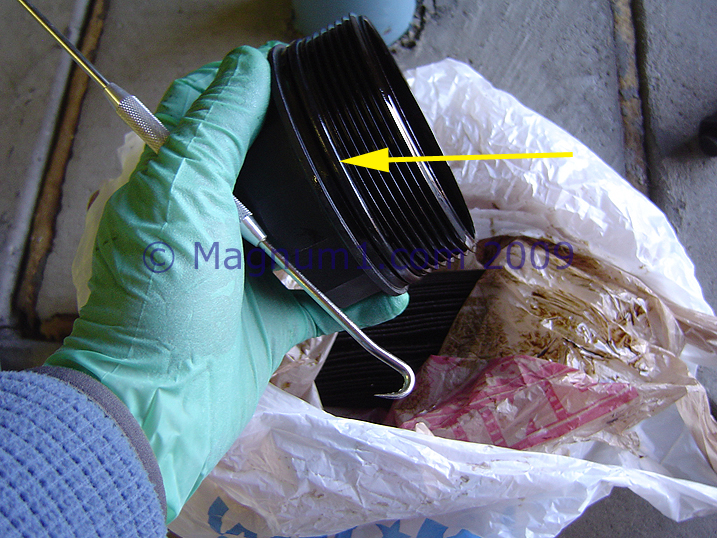
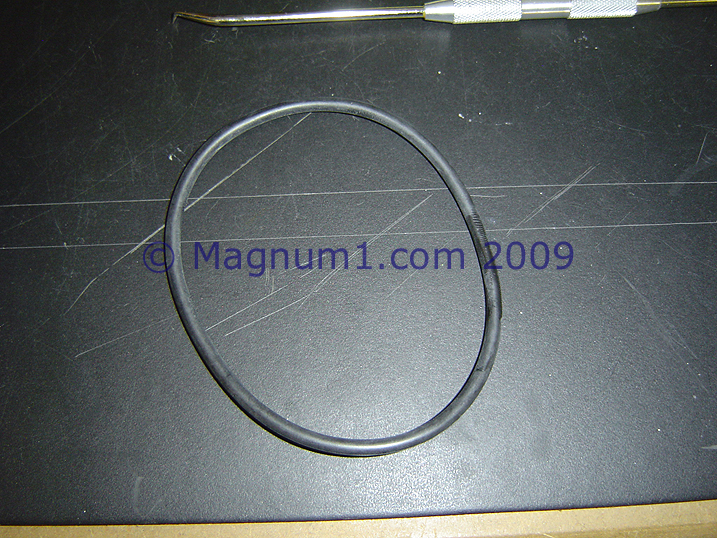
| Then using a screw driver or
o-ring pick, remove the rubber o-ring from the filter cap: |
|
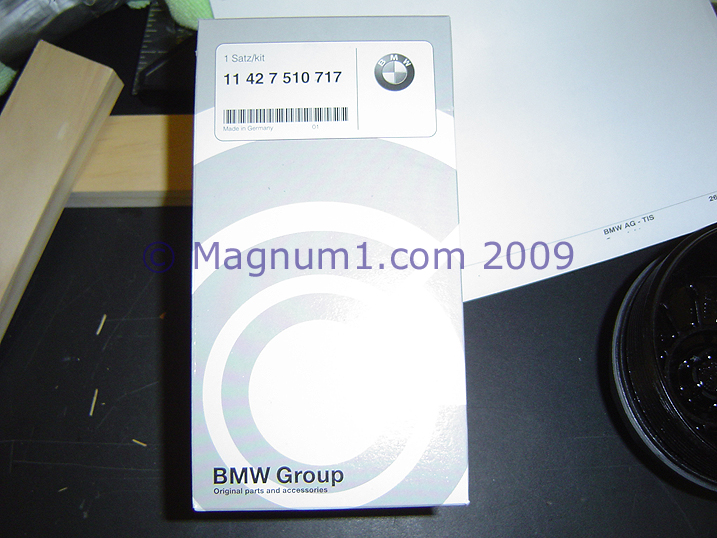
| Bring the cap over, clean it up
and get ready to put the new o-ring on and oil filter in.
Here the box for the kit: |
|
| ....and here's the kit: |
|
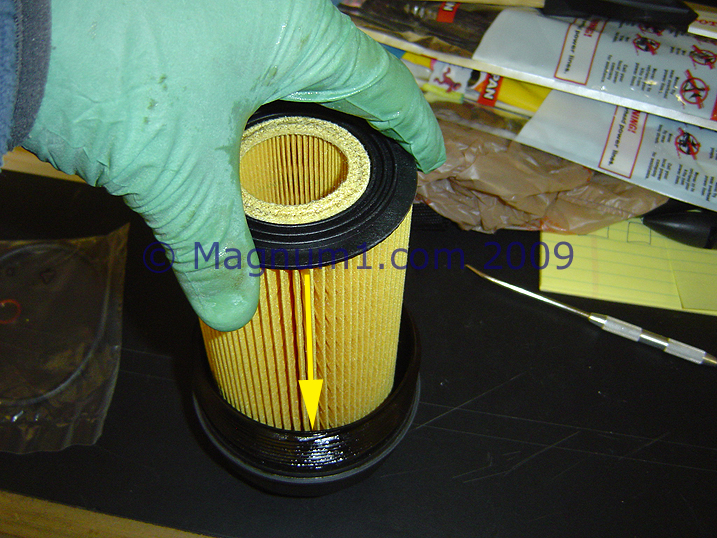
| Snap the filter in the cap.
Put the filter in the cap, line it up and snap the filter down
to seat it in place: |
|
| Like this: |
|
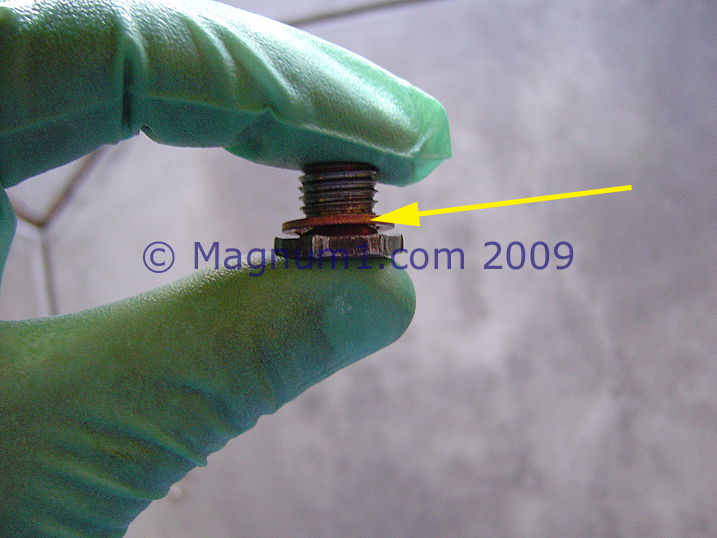
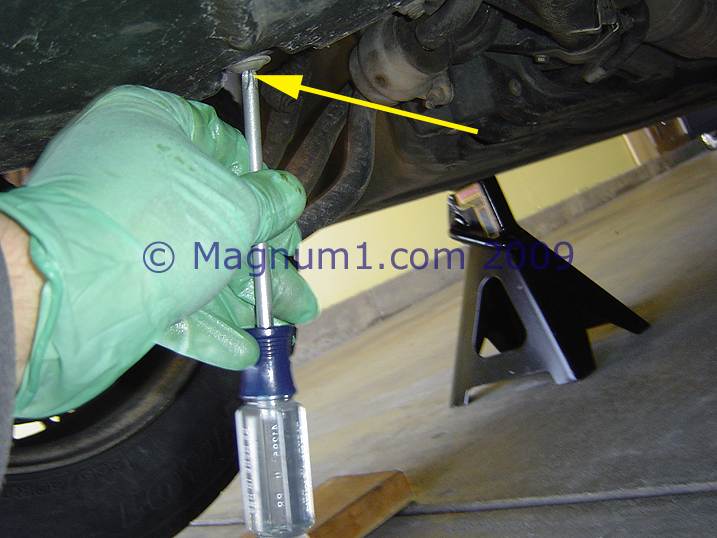
| Now put the new crush ring,
washer or whatever you want to call it on the drain plug: |
|
| Hand thread it as far as it will
go: |
|
| ....and then torque the bolt
down. I torque to about 19 ft. lbs and have never had a
problem. Check the specs yourself or trust your
judgment....your call, not my problem if you strip it!: |
|
| Now clean up any excess oil
around the bolt: |
|
| Put the lower cover on and
tighten both phillips head screws: |
|
| Like so.................: |
|
| Nasty ass oil: |
|
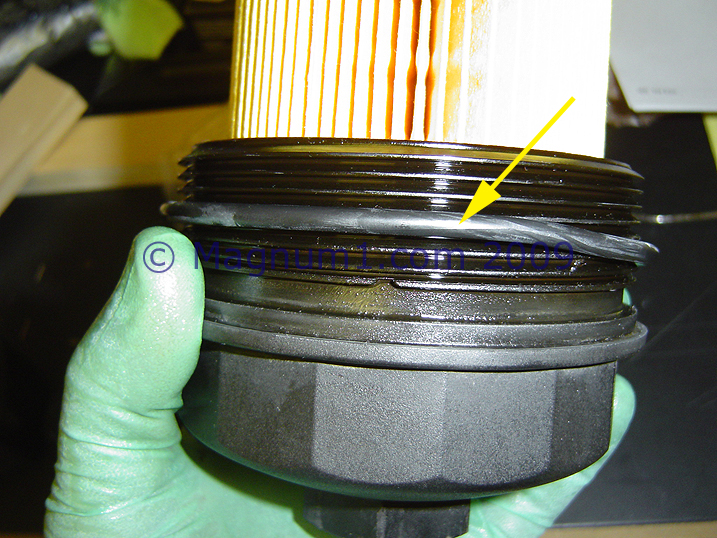
| Now slide the o-ring on the oil
filter cap carefully: |
|
| Like this: |
|
| All the way down to the groove
it fits in: |
|
| Then take some clean oil [maybe
from a new quart] and lightly spread a bead around it: |
|
| Then drop it in the oil filter
canister:
***I don't
"pre-oil" the filter, if you do or want to have at it.*** |
|
| Screw it on hand tight: |
|
| Now torque it down, I use 19 ft.
lbs. Make note and be careful when apply the torque,
there is a tendency to snap the oil filter housing rubber bump
stops. If you break them search my main BMW 740 page and
you'll find the fix. Yeah, I have snapped mine off....lol: |
|
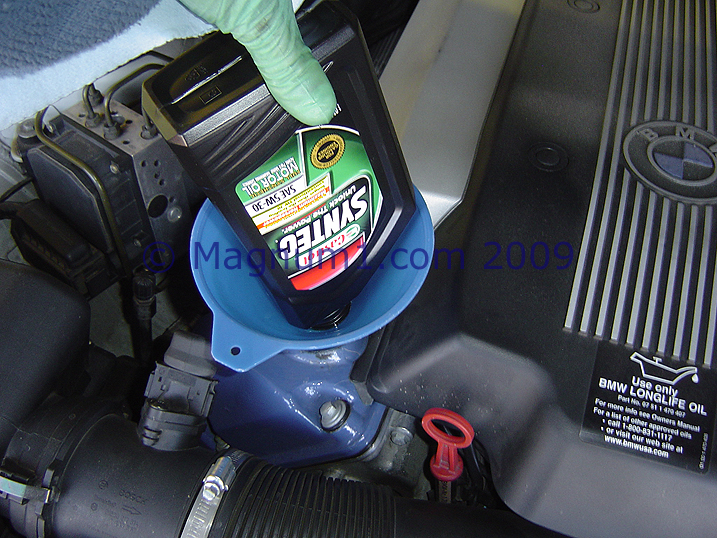
| Now dump the new oil in, 8
quarts, lower the car and let it sit level for a few, then
check the oil level...: |
|
| There you go, all done except
resetting the service indicator lights. Don't mind the
dirty engine compartment, it is winter here.....: |
|
Ok, resetting the service
indicator lights? You really have 3 options:
- Buy a tool that will do it
for you [waste of money]
- Reset it in the engine
compartment via the diagnostic port.
- Reset it via the
instrument cluster [speedo]
I've tried to reset it via a
jumper wire in the engine compartment, but it just doesn't
work, so fortunately for me I have to reset it via the
instrument cluster. I say fortunately because it really
is easy!
|
NO PICTURE |
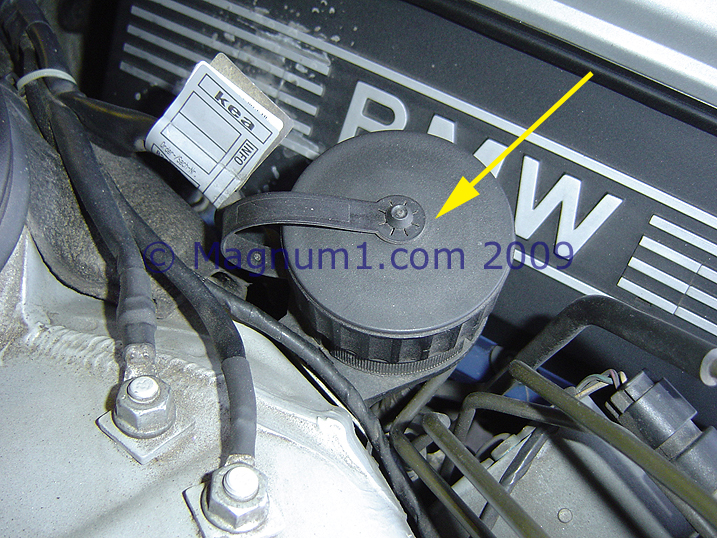
If you want to try and reset it
via the diagnostic port in the engine compartment, the pic
indicates where it is and the description on how to do it is
as follows:
- With the ignition in the
off position
- Put a wire between pins 7
and 19. The pins are labeled inside the cover
- Now turn the ignition to
position 2, the run position, but DO NOT start the engine.
- After just a couple
seconds in position 2, jump out and run over or have your
helper remove the jumper wire. If you wait eight to
ten seconds, it will do an Inspection reset, which you may
or may not want. You do not want a full inspection
reset if you ONLY changed the oil
To make your jumper cable,
just take a piece of really think gauge wire and you can bend
it in a "U" to match up with the pins. |
|
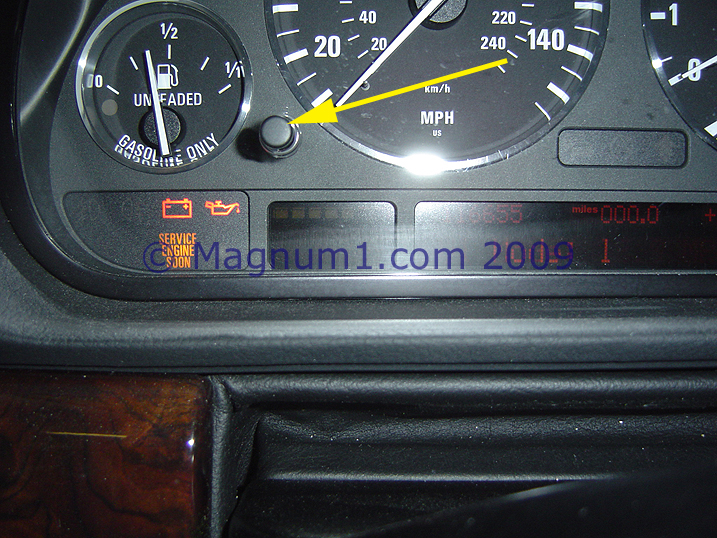
Now, the easy way...
- Ignition in OFF position
- Press and Hold the trip
odometer button [left button, see pic] while you turn the
key to position 1
- Keep the button depressed
[about 5 secs] until you see "Oil Service" or "Inspection"
with "Reset" or "Re" in the display
- Let go of the button
- Now press the button again
and hold for approximately 5 secs. until "Reset" or "Re"
flashes
- Let go of the button
- Now while the display is
flashing, briefly press the button again to reset the
Service Interval. After the display has shown the new
interval you should see "END SIA" for about 2 secs
|
|
| Now turn the key to the off
position, start the car and your inspection lights should be
reset: |
|